반응형

매쉬 변형
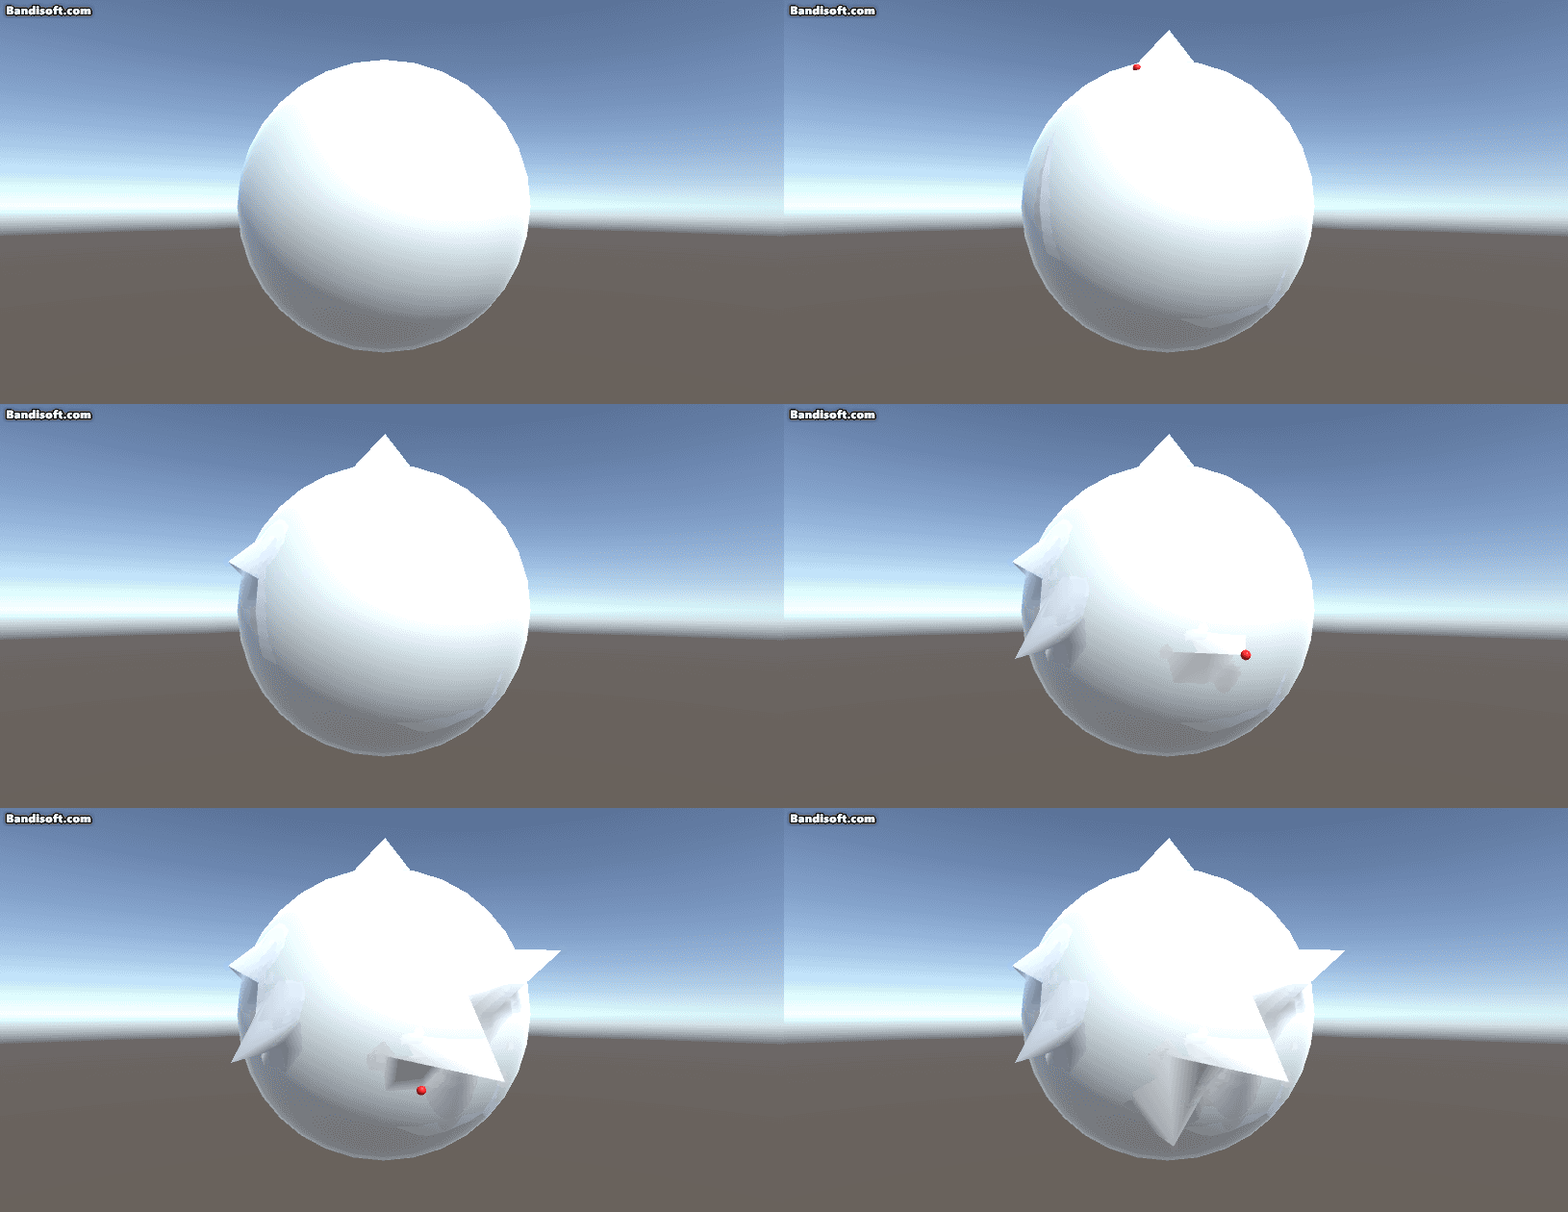
런타임 중 물체 형태 변형 또는 캐릭터 얼굴의 형태를 커스터마이징할 때, 사용되는 기술 중 하나입니다. 유니티에서는 매쉬 변형 관련된 코드를 제공하고 있습니다.
스크립트
MeshDeformer.cs
using UnityEngine;

public class MeshDeformer : MonoBehaviour
{
    private Mesh _deformingMesh;
    private Vector3[] _originalVertices, _displacedVertices;

    private void Start()
    {
        // 매시 버텍스 정보 가져오기
        _deformingMesh = GetComponent<MeshFilter>().mesh;
        _originalVertices = _deformingMesh.vertices;
        _displacedVertices = new Vector3[_originalVertices.Length];
        for (int i = 0; i < _originalVertices.Length; i++)
        {
            _displacedVertices[i] = _originalVertices[i];
        }
    }

    /// <summary>
    /// 월드 포지션에서 가장 근접한 버텍스 반환하기
    /// </summary>
    /// <param name="worldPosition"></param>
    /// <returns></returns>
    public Vector3? GetNearVertex(Vector3 worldPosition)
    {
        Vector3 position = this.transform.position;
        Quaternion rotation = this.transform.rotation;

        Vector3 nearVectex = Vector3.zero;
        float minDistance = float.MaxValue;
        foreach (Vector3 vertex in _displacedVertices)
        {
            var pos = this.transform.TransformPoint(vertex);
            var distance = (pos - worldPosition).sqrMagnitude;
            if (minDistance > distance)
            {
                minDistance = distance;
                nearVectex = pos;
            }
        }
        return nearVectex;
    }

    /// <summary>
    /// 버텍스 수정
    /// </summary>
    /// <param name="targetVertex"></param>
    /// <param name="deformerPoint"></param>
    public void SetVertex(Vector3 targetVertex, Vector3 deformerPoint)
    {
        int[] vertexIndexs = GetVertexIndexs(targetVertex);
        for (int i = 0; i < vertexIndexs.Length; i++)
        {
            var index = vertexIndexs[i];
            if (index != -1)
            {
                _displacedVertices[index] = this.transform.InverseTransformPoint(deformerPoint);
            }
        }
        _deformingMesh.vertices = _displacedVertices;
        _deformingMesh.RecalculateNormals();
    }

    /// <summary>
    /// 버텍스 가져오기
    /// </summary>
    /// <param name="targetVertex"></param>
    /// <returns></returns>
    private int[] GetVertexIndexs(Vector3 targetVertex)
    {
        int[] indexs = { -1, -1, - 1 };
        int setIndex = 0;
        for (int i = 0; i < _displacedVertices.Length; i++)
        {
            if (this.transform.TransformPoint(_displacedVertices[i]) == targetVertex)
            {
                indexs[setIndex++] = i;
            }
        }
        return indexs;
    }
}
해당 스크립트는 매쉬가 있는 오브젝트에 같이 넣어주면 됩니다. 기능은 크게 두가지가 있습니다.
- 월드 좌표를 입력해주면, 가장 가까운 버텍스를 반환하는 함수
- 버텍스를 수정하면 적용하는 함수
예제
 MeshEditor.unitypackage
0.04MB
마무리
캐릭터 커스터마이징을 알아보던 중, 매쉬를 직접 변형하는 경우도 있다는 것을 알게 되어 작성하게 되었습니다. 예제는 그저 정점 하나만 움직이지만, 주변 정점도 Lerp하게 따라오면 좀 더 매끄럽게 매쉬 변형이 가능할 것 같습니다. 저와 같은 기술을 알아보시는 분들께 도움되기를 바랍니다. :)
참고 : https://catlikecoding.com/unity/tutorials/mesh-deformation/
반응형
'R&D' 카테고리의 다른 글
| Unity6, 어드레서블(Addressables) 2.2.2 원격 업데이트 애러 이슈 (2) | 2025.02.25 |
|---|---|
| Unity, 유니티 버전 업그레이드 이후 전체 파일 및 에셋 갱신하기 (Refresh) (0) | 2022.12.22 |
| C#, 서버 시간으로 동기화하기 (HTTP 웹사이트 동기화) (6) | 2022.08.13 |
| Unity, 전역으로 코루틴 사용하기(Static Coroutine) (0) | 2022.07.24 |
| NGUI Atlas 화질 저하 해결 방법 (0) | 2022.04.23 |


댓글